A stopcock controls the mains water entering your home, making it crucial during leaks or plumbing work. Most UK properties have an internal valve near the point where the mains pipe enters the building. Knowing where it is before an emergency can help you shut off the water quickly and limit damage.
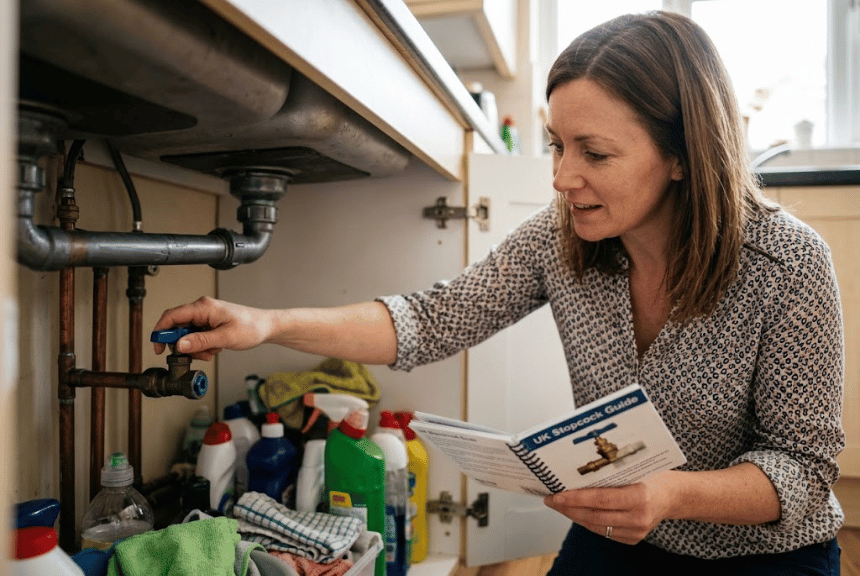
Your internal stop tap controls the mains water entering your home. It is usually under the kitchen sink, but it may sit in a utility room, cupboard, garage, cellar, or under stairs. Turn it clockwise to close, anticlockwise to reopen, and never force a seized valve.
| Key point | What UK households should know |
|---|---|
| Main purpose | Controls the incoming mains water supply |
| Common location | Under the kitchen sink |
| Other locations | Utility room, garage, cellar, cupboard, bathroom, or under stairs |
| Direction to close | Clockwise |
| Direction to open | Anticlockwise |
| If it will not move | Do not force it; contact a suitable plumber |
| Routine check | Test that it operates regularly |
| External valve | Usually near the property boundary or water meter |
Key Takeaways
- Find the internal stop tap before a leak happens.
- Check under the kitchen sink first.
- Turn a traditional valve clockwise to shut the supply.
- Open it slowly when restoring the water.
- Never use excessive force on a stiff or seized valve.
- Keep the area around the valve accessible.
- Show other household members where the shut-off point is.
- Check that it operates around every six months.
What Is a Main Water Stop Tap?
The internal stop tap is the main shut-off valve for the incoming cold-water supply. It sits on the supply pipe after that pipe enters the property. Closing the valve reduces or stops mains water flowing into the home’s plumbing.
Plumbers may also call it an internal stop valve or main shut-off valve. These names usually describe the same basic household control point. Smaller isolation valves beneath appliances or taps serve a different purpose.
An isolation valve normally controls one fitting, such as a toilet or washing machine. The main valve controls the incoming supply for much more of the property. That difference matters when water is escaping quickly from an unknown location.
How to Find Your Stopcock in a UK Home
Start beneath the kitchen sink because this is the most common location in UK properties. Look towards the back of the cupboard where the incoming cold-water pipe appears. The valve often resembles a small tap without a spout.
If you can’t find it, follow the likely route of the mains supply through your home. Check near the front or outside wall first. WaterSafe guidance also lists garages, utility rooms, cellars, downstairs bathrooms, and under-stair areas as common locations.
Possible places include the following.
- Under the kitchen sink.
- Inside a kitchen cupboard.
- In a utility room.
- Beneath the stairs.
- In a downstairs toilet or bathroom.
- In a garage.
- In a cellar.
- Inside an airing or service cupboard.
- Near the front door.
- Beneath accessible floorboards.
Home alterations can make older valves harder to spot. Previous owners may have installed cabinetry, appliances, or decorative panels around existing pipework. When planning storage, Scrollex’s utility room ideas can help you keep essential services accessible.
What Does the Valve Look Like?
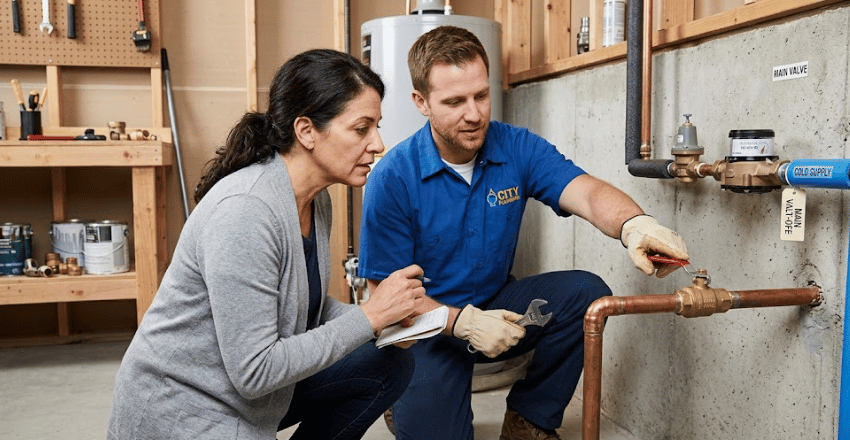
Traditional internal valves usually have a metal body fitted directly between two pipe sections. Many use a small cross-shaped or T-shaped handle that requires several turns. Newer installations may instead use a lever that operates through a quarter turn.
Don’t identify a valve by appearance alone, because several plumbing controls can look similar. Follow the pipe and consider what the valve appears to supply. A small valve connected directly to one appliance is probably a local isolator.
The main valve should normally sit on the incoming supply before that water branches around the home. Its location can therefore offer the strongest identification clue. A plumber can confirm the correct valve if the pipework remains unclear.
How to Turn the Water Supply Off Safely
Before touching the valve, make sure you can reach it without straining or disturbing nearby pipes. Remove stored bottles, bins, or cleaning products from the area. Then operate the handle slowly rather than applying sudden pressure.
To shut off a traditional internal stop tap:
- Turn the handle clockwise.
- Keep turning gently until the valve closes.
- Open a cold tap and watch the flow reduce.
- Allow a short time for the remaining water to drain from the pipework.
- Confirm the supply has stopped before starting plumbing work.
WaterSafe says the flow may take a few minutes to stop completely after closing the valve. The organisation also advises operating the control slowly and avoiding excessive force. These precautions can reduce the risk of damaging an older fitting.
If you are renovating a kitchen, locate the main shut-off before cupboards conceal existing pipe routes. This is especially useful when sinks, taps, dishwashers, or pipework will move. Scrollex’s new kitchen cost guide also covers plumbing among wider renovation considerations.
How to Turn the Water Back On
Reopen the valve by turning it anticlockwise slowly. Avoid opening it quickly, as the system is filling and repressurising. Check nearby joints and recently repaired fittings as the water returns.
Let a cold tap run briefly once the supply has been restored. This can help clear trapped air and confirm that normal flow has returned. Listen for unusual noises and inspect the work area for signs of leakage.
Traditional screw-down valves should remain usable and not be forced tightly into either position. WaterSafe advises turning screw-down types back slightly after fully opening them. Lever-type controls should normally remain fully open during everyday use.
What Should You Do if the Valve Is Stuck?
A stiff control needs patience, not extra force. Applying a long spanner, bar, or excessive torque can damage the spindle or nearby pipework. A minor maintenance problem could then become an active leak.
Try only gentle hand pressure if the handle does not move normally. If it remains seized, stop and don’t force it. WaterSafe recommends contacting a plumber when an internal valve will not turn or shut properly.
Address a non-working shut-off point before an emergency develops. WaterSafe recommends checking that households can operate their internal valve around every six months. Regular movement can also reveal stiffness before you need urgent isolation.
What if the Internal Valve Leaks?
Moisture around the valve should not be ignored because several components can develop wear. Water may appear near a pipe joint, compression connection, spindle, or internal washer. The exact repair depends on the leak’s origin.
Do not repeatedly tighten fittings without identifying the leaking component. Excessive tightening can damage pipe connections or valve parts. If the leak increases during operation, close the supply elsewhere where possible and seek professional help.
Older properties can contain plumbing that has been altered during several generations of refurbishment. Knowing the property’s age may provide useful context before major renovation work. Scrollex explains several research methods in its guide to finding when your house was built.
Internal and External Stop Valves: What Is the Difference?
An internal valve sits on your property and lets you control the incoming supply. An external stop tap is usually positioned near the property boundary. It may sit under a small cover in a pavement, driveway, garden, or meter chamber.
External controls require more caution because responsibility and permission can depend on the local water company. WaterSafe advises that these valves should ideally be operated by the water supplier or a qualified plumber. Damaging a supplier-owned fitting can leave you responsible for repair costs.
Shared supplies can complicate arrangements in flats and converted properties. One external valve may serve several homes rather than a single address. Contact your landlord, managing agent, plumber, or water company if you’re unsure about the supply arrangement.
What About Flats and Shared Buildings?
Flats do not always follow the familiar under-sink arrangement found in houses. The shut-off point might be in a communal service riser, meter cupboard, hallway, or another shared area. Some flats also have an additional internal valve where their individual supply enters.
If you can’t locate the valve, check property information, tenancy documents, or building management records. Your landlord or managing agent may already know where the individual controls sit. Don’t operate an unidentified communal valve, as it could interrupt neighbours’ supplies.
Access is also important when cupboards or fitted storage surround household services. Scrollex’s wider Home Improvement section covers planning considerations for practical UK living spaces. Future alterations should preserve access to essential water controls wherever possible.
When Should You Check the Valve?
Don’t wait for a burst pipe to confirm the shut-off works. Test the control gently during normal household maintenance. WaterSafe recommends checking about every six months, which provides a simple schedule for most homes.
Choose a memorable recurring date, such as when the clocks change. Confirm the handle moves and that closing it reduces the cold-water flow. Reopen it slowly after the test and inspect the surrounding pipework.
You should also check the valve before starting significant plumbing or renovation work. A working shut-off makes planned maintenance easier to control. It also gives tradespeople a reliable isolation point if an unexpected leak develops.
A Simple Water-Emergency Plan for Your Household
Finding the main valve is easier when everyone knows where it is. Show other adults in the household how to reach and operate it safely. Keep the cupboard or access space clear enough for quick use.
A simple emergency plan should include:
- Know where the internal shut-off valve is.
- Keep its access point unobstructed.
- Label it clearly if necessary.
- Know where the external supply point is located.
- Keep your water supplier’s contact details available.
- Know which plumber you would call for urgent help.
- Avoid touching electrical equipment near escaping water.
If a serious leak occurs, shut off the water when it is safe to do so. Keep away from electrical equipment affected by water. Seek professional assistance when you cannot isolate the supply safely.
Frequently Asked Questions
Which way turns the water off?
A traditional screw-down internal stop tap normally closes when you turn it clockwise. It opens when turned anticlockwise. Turn it slowly, and don’t force the handle once it becomes firm.
How often should I test my stopcock?
WaterSafe recommends checking that the valve operates around every six months. Regular testing helps you spot stiffness before an emergency. Set a recurring household reminder so you don’t forget.
Why is there still water after I close the valve?
Water already held inside the pipework may continue flowing briefly after isolation. Storage systems can also affect how long certain outlets continue supplying water. Open an appropriate cold tap and allow time for the remaining flow to reduce.
Can I use the outside valve myself?
First, check your local water company’s guidance. External supply valves may belong to the water supplier and can affect shared services. WaterSafe advises that a supplier or qualified plumber should ideally operate them.
What should I do if I cannot find the main valve?
Check the kitchen, utility room, garage, bathroom, cellar, under stairs, and near the front entrance. Flats may use service cupboards or communal risers instead. A plumber, landlord, managing agent, or water company can help identify the correct control.
Make Finding It a Job for Today
Knowing how to shut off your home’s water can turn a serious leak into a more manageable problem. Find the internal valve while the house is dry and you don’t need to act quickly. Check that it moves freely, and make sure other household members know where it is.
Don’t force an old or seized fitting, as damaged pipework can create a bigger problem. If the valve leaks, sticks, or fails to isolate the supply, arrange professional attention. A few minutes of preparation now can make your response much faster when you need to stop the water.